https://slickshares.com/tree?u=rm

Friday 13 March 2020

My First Grotto.


Disclosure: This post contains some affiliate links to products that I use and love. If you click through and make a purchase, I’ll earn a commission, at no additional cost to you. 


So I start with the foundation.  Clear out the space, mix up the concrete. For this I used the ready mix bags from builder's warehouse. Mix, cast, leave to set.  The following day I used up the left over blocks from a previous project to build up the base. This is the load barring part of the structure.  I  proceed to fill cavities and gaps with cement.
Now this needs to dry and set so that it can be filled with rubble and compacted. Then I close the top with dry cement....topping.

Find Your Right Floor & Save 10% on All Styles – coupon code: FRIEND10 12 Month Financing


Now the base is done, it time for the actual arch.  I need a form to build on.  Shutter ply and hard board/Masonite. To get this right I measured the statue, head to toe and finger tip to finger tip and then added about 10 - 15 mm right around.  Fortunately for me I was  building up against an existing wall so there was no need to do anything around the back of the grotto.  After positioning the form into place it was time to start the stone work.


I started by sorting the stone, gabion stone I used. They are hard. I kept all the small to medium sizes together. Mixed up the cement and started placing stone upon stone. Fitting, removing and refitting the stones like a puzzle. I kept my mortar on the wetter side so that its more sticky than dry. It took a while. After I had completed the dome I proceeded to clean the stone and fill any gaps.
I was tempted to pull the form out to see how the grotto would look.  With the stone work still wet, I decided to leave it just as is.


"It might collapse" I thought. Step away, step away.
I returned a week later to remove the wooden form. While praying, I gently cut and tapped at the wood until it came out. I sighed and smiled with relief. The grotto didn't collapse or fall.


Now once everything was dry I could clean up and finish. I used a wire brush to clean away the dry chunks of cement and cement dust.  Then I plastered the inner wall.  Around the base I layer facebrick. Pretty straight forward. Between blocks and facebrick I chalked a strong cement mix. This is to act as a glue. Thinking back I probably should have used pins/pegs to tie the two together.


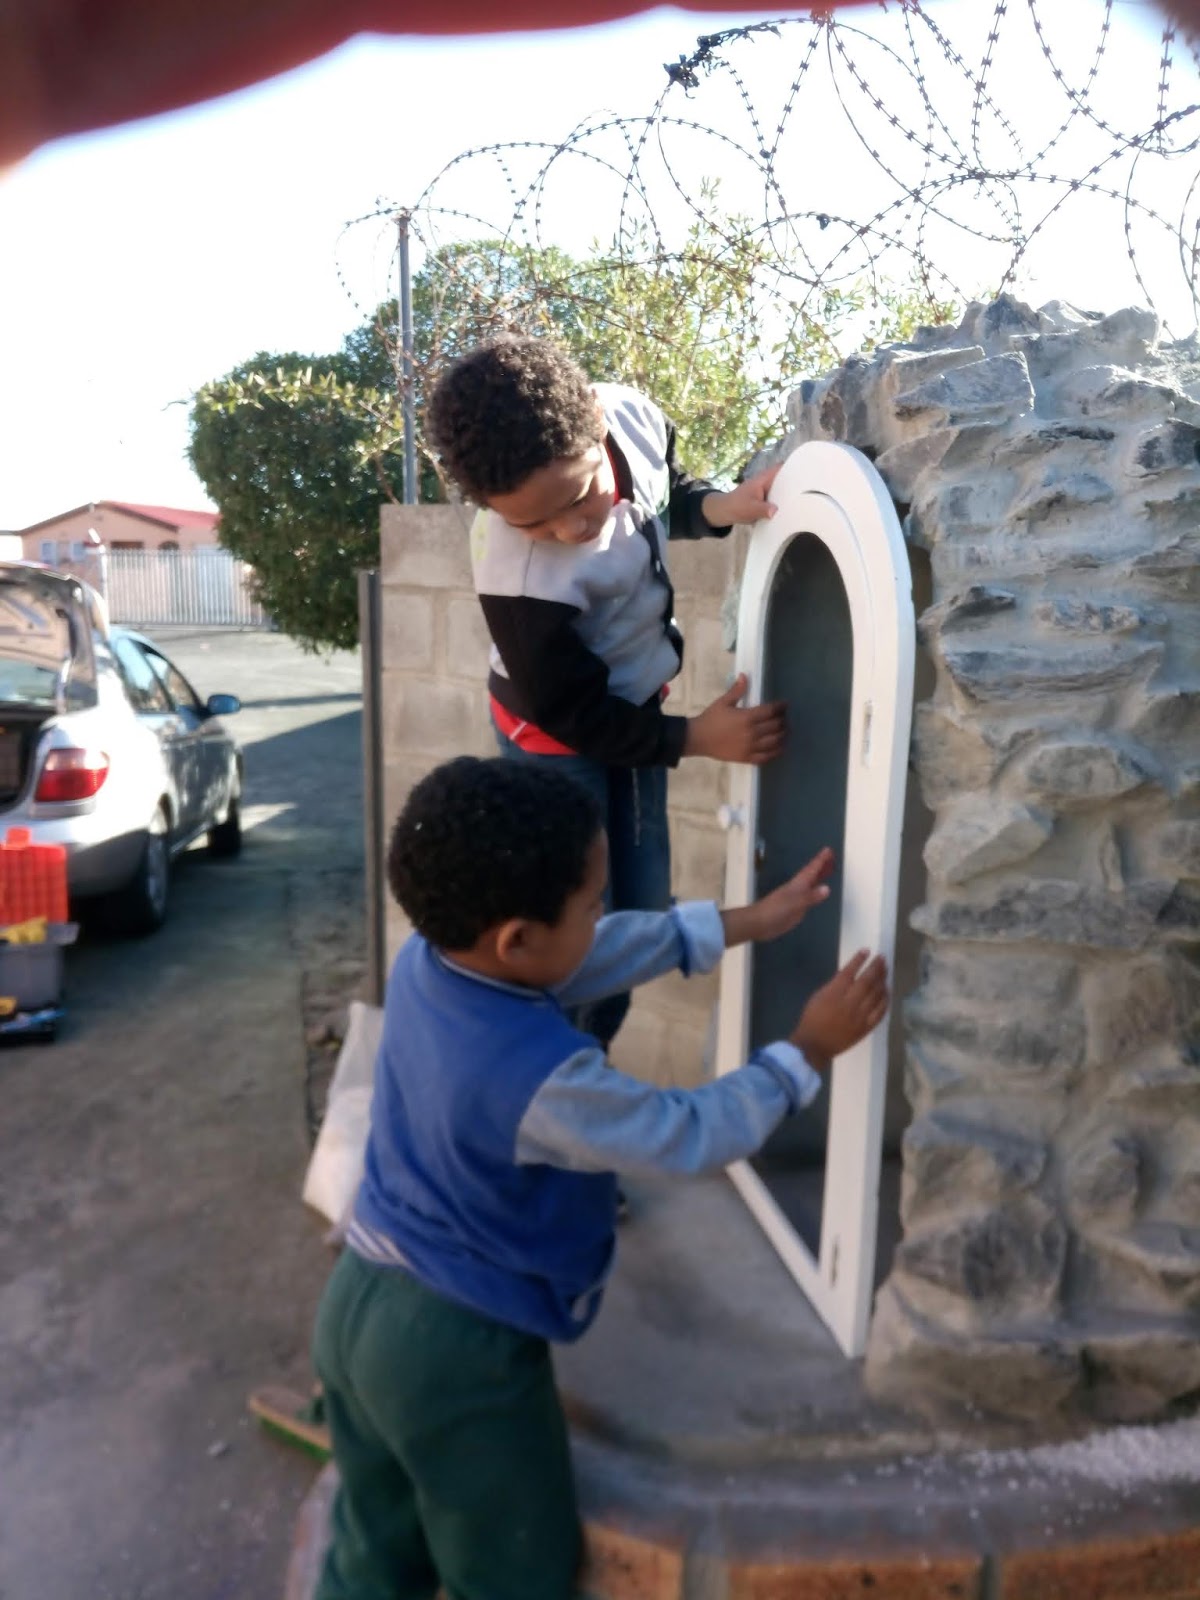
This was an awesome experience a lot of fun and lots of hard work. I got my sons in to help me fit a little door.


Thursday 23 January 2020

Block Bench


 Disclosure: This post contains some affiliate links to products that I use and love. If you click through and make a purchase, I’ll earn a commission, at no additional cost to you. 


So my cousin came to me and asked "Ricky, can you build a bench with bricks, cement an stuff?". I glanced at her from the corner of my eye and giggled "yes".  She went on to explain that the people she was renting from wanted a bench next to their pool.
Later that week I went round to have a look and to here what the client wanted. The mother and her two daughters handed me a picture downloaded from the net and ask " can you make it?" I said nothing and took the page.
They lead me out the door to the back, the pool area, to show me the space.


 Picture to the left is what I found. The client told me that they got a guy in who claimed to be a bricklayer and he said he could recreate the bench on the page.  They where mortified by the result.
I'm standing there smiling thinking "Damn, this guy is gonna make me look SO good".
I proceeded to break the existing structure with my hammer and chisel. Cleared the space out. I use a straight edge and spirit level to level out the ground.
I marked out a curve in the sand and packed out the blocks to create a visual. Then I called the girls, and granny, to come look. Granny took one look and said "it too big, make it a bit smaller". I did. Then called them out again. They where happy with the size. Lucky their gardener was on hand to help bring closer the sand, stone and cement. Together we mixed up a gauge of concrete. We cast the concrete foundation. Then let it set over night.
Next day started with the block work. Block by block. Brought the bench up. The seat I left hollow. The seat I filled with rubble and sand. Compacted that.


I layed a row of blocks on their side as seen in the pick to the left. Good bum to seat ratio.


I started to plaster the structure up. I'm not the best with a plaster trowel and hand hawk but the job came out Beautiful.

I went ahead with the levelling of the area in front of the chill area. Layed the pavers that were there and spread the stone about. The painting was done by the family themselves. They did an excellent job.


Saturday 21 December 2019

How To Survive Load Shedding

HOW TO SURVIVE LOAD SHEDDING
             A Layman's Guide

All is well, the TV is on, the kids are occupied and calm. Pots are simmering and hubby got his feet up. You're home and it has been a long day....and then....
https://www.loot.co.za/shop/img/banners/468x60banner.gif It happens. Load Shedding. Eskom strikes again. You feel the sadness creep up into your soul as you scramble, scratch and fumble around looking for your phone to activate the torch app. Meanwhile the kids have 101 questions about the obvious and your mind hasn't processed "the we need light" part properly yet. Know the feeling?
Well, here are some suggestions and ideas
Luminous paint. Paint a one of the kitchen drawers with luminous paint so when the lights go out.....glowing drawer. Why do I need a glowing drawer? That's your emergency drawer. Matches, candles, lamps, torches etc.

Or one could invest in rechargeable bulbs. Clever bulbs that have their own batteries that charge while the power is on and then stay on when the power goes out. I personally love these bulbs however, they are a bit pricey so, I would not fit the entire house rather the necessary areas like kitchen, bathroom, outside....OK maybe the living room. 
Nothing worse than not being able to cook or God forbid we can't make a cup of tea/coffee. For me the obvious choice here is gas. Two plate stove is all you need really. One for the kettle and one for the pot. There a range of gas stoves to choose from. If your a camper then don't break the bank your only gonna whip it out for those three hours of load shedding then pack it away after.  If your already on gas good for you. Work safely with gas. 
To keep devices charged there is a power station ( a big larnie power bank) which can charge most devices and power lights. These cost a pretty penny so in your emergency drawer have spare emergency power banks to top up cell phones. 
For surviving load shedding the fridge and deep freezer can remain off for the three hour shut down. Fridge will retain its cold for 4-6 hours freezer 24hrs. Freeze up a few bottles of water and when the power fails pop the frozen water bottles into the fridge. Also a full fridge holds its temperature longer. 
TV? ....leave it of even the devices for that matter. Devices (cell phones) are there for any emergencies illness, accident etc. Talk to each other it's only three hours. Dust off the old board games.
Oh p.s. remember switch off appliances at the plug sockets to protect them from returning spike or surge. Or purchase surge protector it looks like this.
The name of the game is "be prepared."  So in closing, when the lights go out don't rise to the occasion, sink to your preparation.

Disclosure: This post contains some affiliate links to products that I use and love. If you click through and make a purchase, I’ll earn a commission, at no additional cost to you. 


Thursday 23 June 2016

Hallway made Heavenly

The status of the hallway was warn, weathered and a tad out dated. Added to which the ceiling paint was cracked and peeling. Not on.
Enter woodenthumbs AKA gifted hands.
  

First things first, drop sheets down. Scrappers out. I start scraping all loose flaking paint from the ceiling. It's now snowing paint flakes.
Working with a ladder on stairs is a hassle at the best of times. In this case the client happened to be a fellow DIYer and hooked me up with a nifty accessory for the ladder.

As seen here to the left.


Done making it snow?....with all the loose paint scrapped off the ceiling you are left a patchy ceiling.                                                
Like this, see.
Now a step is formed between old paint and the unpainted surface. That step will show up soon as it's painted. To get rid of the step I used fine crack filler. I blend the two surfaces creating a 'ramp'. This now needs to dry. Leave it.


When the filler has dried completely it is time to start sanding. Another round of snow. Ha ha ha looks like I've been messing with flour. So now the surface is smooth and the step disguised. Time to paint.
Now to prevent a patchy finish the scrapped, original, surface gets a coat of masonry primer. Then a further coat of the colour, in this case white, before the ceiling gets coated as a whole. Remember to allow paint to dry between coats. I applied two coats so the finish is twice as nice.


That takes care of the ceiling. Now the wall. Thankfully the walls where in good shape so all I did was roll on the new colour.                                                                                            Just like this

Wednesday 16 March 2016

Water Harvesting Tank Installation

Catch and Create your own water

Disclosure: This post contains some affiliate links to products that I use and love. If you click through and make a purchase, I’ll earn a commission, at no additional cost to you. 

With the resent scarcity of rain, water has becomes the new 'rare commodity'. Soon we'll be trading it on the stock market if things continue the way they are. With low to no rain fall coupled with a "....I pay my water." attitude we are heading for trouble. So in keeping with the 'green' trend and the save water campaigns being run by government, here's what I did.


I installed a 5000l water tank. Simple as that. Rural South Africa has been doing it for years.
First I cleared out a space for my tank and leveled the space out. Then I proceeded to mix up a batch of dagga...mortar, not weed! Cast a circular foundation and let that set and cure, 24 hours.

Since I was on a tight budget I opted for stone instead of buying blocks or bricks. Stones were free and I happen to like a stone finish. It was time to tap into my inner stone mason. I had to tap quite deep. I'm not gonna lie, it was labor intensive. Collecting and carrying. Then I sorted them and began to lay my first course. It was like doing a puzzle. Looking for the right piece to fit in and those that didn't cooperate got chiseled to fit. I must say, with all the chiseling, mixing and carrying my arms got quite the workout, it would have been great to have a mortar mixing machine but my protruding veins and glistening skin from the sweat gave the ego a great boost.

I brought my master piece up six courses. Cleaning the cement off the stone. 


I filled her up and compacted the earth and rubble till it was hard. I now had a hard solid platform for my big green water tank. Now an empty water tank is not that heavy. It's getting ones arms around the thing to that may cause problems. At this point it's good to have a second pair of hands to help lift and position.


Right! Once I had it up and positioned I anchored it down with wire. On the top are 'pikes' that are for tying the wire round. Within my stone work I build in steel pegs. As the tank is positioned under and at the end of the roof, one can simply redirect the down pipe to run into your tank.
Now when it rains all the water God sends, you catch....amazing!

Now what happens when it doesn't rain? Well you make your own water. How? Easy, an what's more you've been making it the whole time and you didn't realize it.
The roof on your house is a water making machine. Condensation people! We have been wasting liters and liters of water. But now with my snazzy green water tank I get water even when it doesn't rain.
Thank you for reading Like, Follow, Comment and Share