Disclosure: This post contains some affiliate links to products that I use and love. If you click through and make a purchase, I’ll earn a commission, at no additional cost to you.
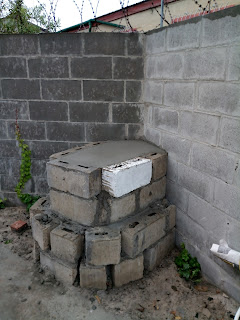
Now this needs to dry and set so that it can be filled with rubble and compacted. Then I close the top with dry cement....topping.
Find Your Right Floor & Save 10% on All Styles – coupon code: FRIEND10 12 Month Financing
Now the base is done, it time for the actual arch. I need a form to build on. Shutter ply and hard board/Masonite. To get this right I measured the statue, head to toe and finger tip to finger tip and then added about 10 - 15 mm right around. Fortunately for me I was building up against an existing wall so there was no need to do anything around the back of the grotto. After positioning the form into place it was time to start the stone work.

I started by sorting the stone, gabion stone I used. They are hard. I kept all the small to medium sizes together. Mixed up the cement and started placing stone upon stone. Fitting, removing and refitting the stones like a puzzle. I kept my mortar on the wetter side so that its more sticky than dry. It took a while. After I had completed the dome I proceeded to clean the stone and fill any gaps.
I was tempted to pull the form out to see how the grotto would look. With the stone work still wet, I decided to leave it just as is.
"It might collapse" I thought. Step away, step away.
I returned a week later to remove the wooden form. While praying, I gently cut and tapped at the wood until it came out. I sighed and smiled with relief. The grotto didn't collapse or fall.
Now once everything was dry I could clean up and finish. I used a wire brush to clean away the dry chunks of cement and cement dust. Then I plastered the inner wall. Around the base I layer facebrick. Pretty straight forward. Between blocks and facebrick I chalked a strong cement mix. This is to act as a glue. Thinking back I probably should have used pins/pegs to tie the two together.
This was an awesome experience a lot of fun and lots of hard work. I got my sons in to help me fit a little door.


2 comments:
Thank you for all the pictures. You and your boys did an awesome job! I’m thinking of making a grotto too but first I need to figure out how to fix a cement Mary that I found with missing hands. Congratulations on job well done. Looks professional.
Joann thank you.
Depending on the size of your Mother Mary you could you two part epoxy putty, easier to sculpt than cement. Use wire as bones then build up the hand with putty piece by piece. Look at your own hand...'copy and paste'... good luck and just have fun with it.
Post a Comment